EZVIZ App: How to Set Up Your Camera and View It on Your Phone (2026)
Short answer: The EZVIZ app is EZVIZ's free app for setting up your camera, watching it live and playing back recordings. Install it from Google Play, the App Store or Huawei AppGallery, sign up and choose your region carefully, because it can't be changed later. Then connect your phone to 2.4 GHz Wi-Fi, tap +, scan the QR code on the camera's label and follow the prompts. The verification code is the 6 capital letters on the same label.
Shop at Quality Computer
EZVIZ cameras and microSD cards View all →
What you need
For EZVIZ's own Wi-Fi cameras, have these ready before you start:
- Your camera, plugged in near your Wi-Fi router for the first setup.
- Your Wi-Fi name and password. Your phone has to be on 2.4 GHz Wi-Fi while you set the camera up (EZVIZ).
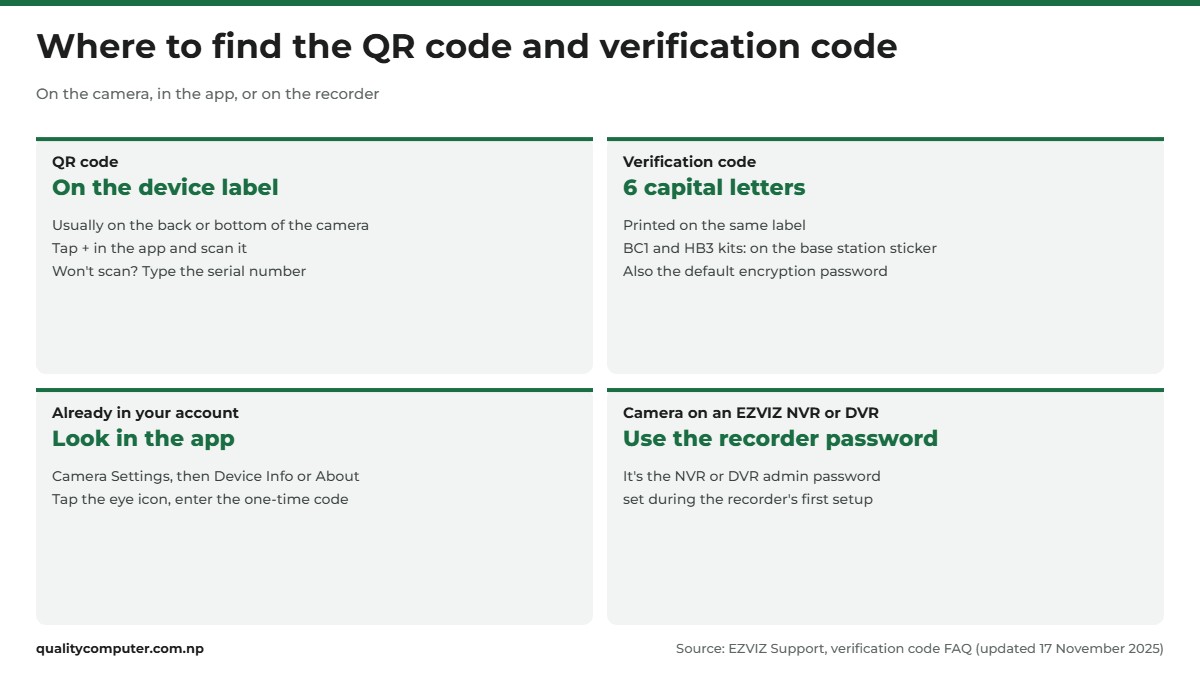
- The label on the camera, usually on the back or bottom. It carries the QR code and the 6-letter verification code.
- A microSD card, or a CloudPlay plan where EZVIZ offers one, if you want recordings to play back later.
Still choosing a camera? Our guide to EZVIZ cameras in Nepal compares indoor, outdoor, 4G and battery models. If your cameras are Hikvision and record to an NVR or DVR, follow our Hik-Connect setup guide instead.
Install the EZVIZ app and sign up
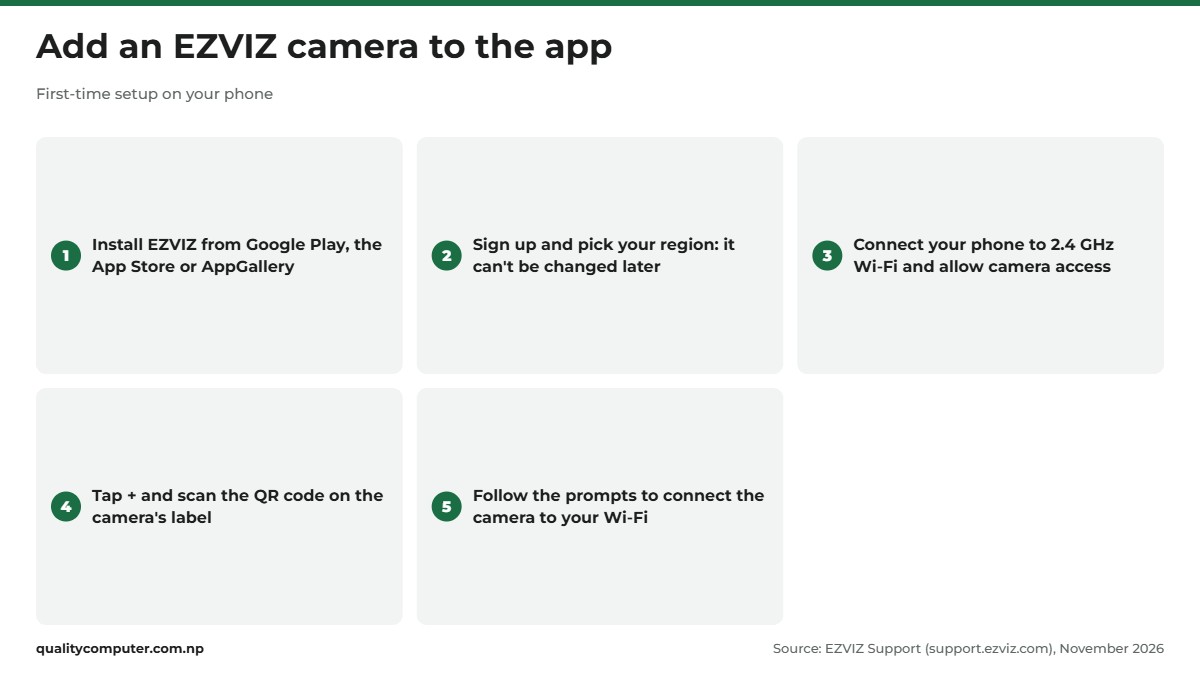
Search for EZVIZ in Google Play, the App Store or Huawei AppGallery (EZVIZ). People often type it as "EZ Viz". Check that the developer is EZVIZ Inc. before you install. The App Store lists it as free, and on an iPhone it needs iOS 15.1 or later (App Store).
Open it and tap Create New Account. First, set the region with the selector at the top right. Then enter your phone number or email, set a password, accept the terms and tap Continue. Type the picture code, tap Apply, then enter the code EZVIZ sends you (EZVIZ: create an account). EZVIZ recommends linking both a phone number and an email to the account.
Why the region matters
Once an account is registered, its region can't be changed. You'd need a new account (EZVIZ). Sharing also works only between accounts in the same region, and when you sign in on a new phone you need to pick the same region again (EZVIZ).
Pick the country you live in. We found no EZVIZ sign-up advice written for Nepal, but its regions notice lists Nepal among the countries it serves. If a relative abroad will watch your cameras, ask them which region they chose before you try to share.
Use a phone number or email you'll keep for years. The cameras will belong to this account.
EZVIZ camera setup: add your camera
- Power on the camera. If it has been set up before, reset it first and wait about a minute for the light to change (EZVIZ).
- Connect your phone to your 2.4 GHz Wi-Fi and allow the app to use the phone's camera.
- On the home page, tap + and scan the QR code on the camera's label.
- Follow the prompts to connect the camera to your Wi-Fi. When it's done, the camera appears on your home page.
If the QR code won't scan, add the camera by serial number. Tap +, then Add Device, then the scan icon. On the Scan QR Code page, tap the edit icon at the top right and type the serial number. Have the verification code ready as well (EZVIZ).
EZVIZ's pages give reset times from about 4 to 5 seconds (reset guide) to 10 to 15 seconds, so check your camera's quick start guide. On many models, fast-flashing blue means the camera is ready for Wi-Fi setup and slow-flashing red means the Wi-Fi connection failed (C1C manual).
What happens during Wi-Fi setup
EZVIZ lists AP pairing as the Wi-Fi method in its H6c specifications. During setup, a camera that uses AP pairing makes its own temporary network, named EZVIZ_ followed by its serial number, and your phone joins it to finish the configuration. If the app can't join that network, connect to it yourself in your phone's Wi-Fi settings. The password is EZVIZ_ followed by the verification code. Then go back to the app (EZVIZ).
Where the verification code is
The device verification code is 6 capital letters, printed on the camera's label. If the camera is already in your account, open its Settings, then Device Info or About. On some models you then tap the eye icon and enter the one-time code EZVIZ sends to your email or phone. For a camera first added to an EZVIZ NVR or DVR, it's the recorder's admin password (EZVIZ).
Live view, playback and recordings
Tap a camera on the home page to watch it live. For playback, open the live view page, choose the time you want and tap the recording (EZVIZ). Live view through EZVIZ's servers times out every few minutes. Tap Continue to keep watching (EZVIZ).
On cameras that support it, LAN Live View lets a phone on the same Wi-Fi watch the camera with no time-out. Tap the profile icon at the top left, then Settings, LAN Live View and Start Scanning. If you can't sign in, the play icon at the top right of the login page opens it. The username is admin and the password is the verification code (EZVIZ).
microSD card or CloudPlay
Recordings are usually kept in one of two places: a microSD card inside the camera, or EZVIZ CloudPlay, a paid cloud plan.
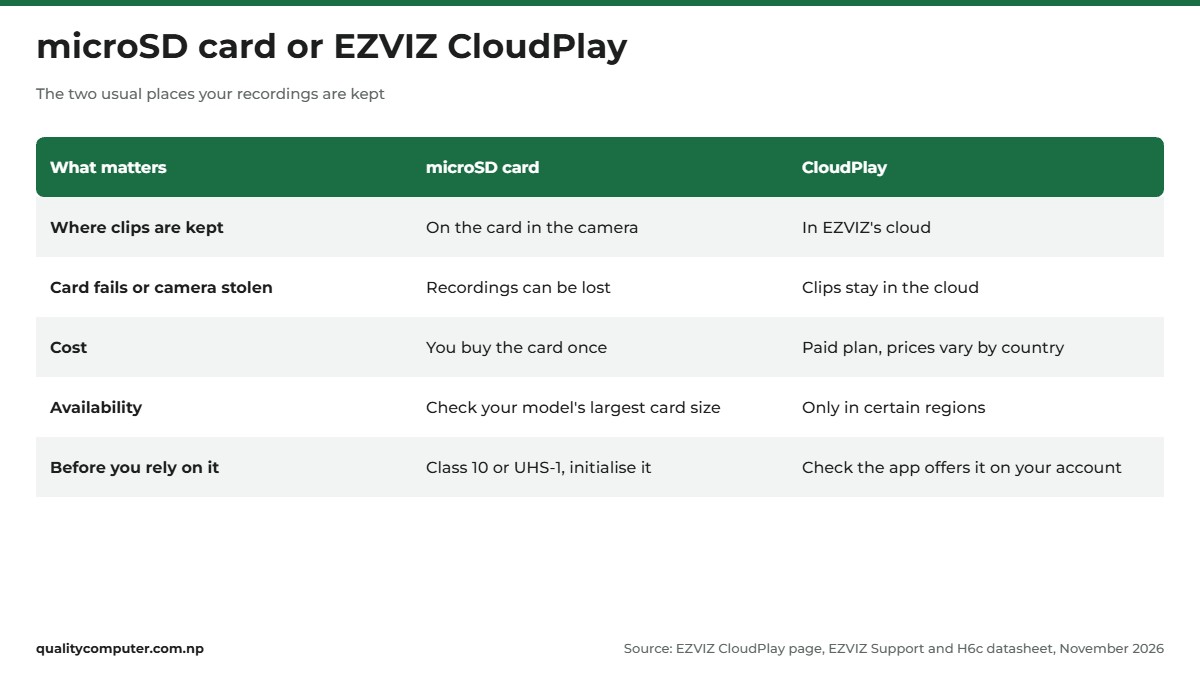
CloudPlay keeps clips off the camera, so they survive a failed card or a stolen camera. EZVIZ's international page describes event-based video history and a free trial of up to 30 days, but says plans and prices vary by country (EZVIZ CloudPlay). EZVIZ also says cloud storage is only available in certain regions, so check what the app offers on your account. We couldn't find an official CloudPlay price for Nepal.
Setting up the microSD card
Use a Class 10 or UHS-1 card (EZVIZ). Insert it, then initialise it: on the home page tap the three dots next to the camera, open Device Settings, tap Storage Status (or Record List), then Memory Card, then Initialize/Reformat (EZVIZ).
Check your model's largest card size before you buy. The H6c 4MP, for example, takes up to 256 GB. Our guide on which memory card to buy explains endurance cards and how many days of footage each size holds.
To watch the card on a computer, put it in a card reader and open the files with the MP4 player on EZVIZ's download page.
Motion alerts and privacy settings
To get motion alerts, tap the three dots next to the camera on the home page, open Device Settings and turn on Alarm Notification. On some models, including the H8c and CB3, it's under Notification instead: turn on Receive Device Message and EZVIZ App Notification (EZVIZ).
Getting alerts all day? Under Alarm Notification, tap Set Notification Schedule. On the other models, tap Notification Schedule, then Customized schedule. A schedule can't run past midnight, so for night-time alerts make two periods: one ending at 23:59 and one starting at 0:00 (EZVIZ). The app also lets you set detection zones and sensitivity, which helps when passing traffic or a moving tree keeps setting it off.
For privacy, Video Encryption is under Device Settings, then Privacy Settings. On some models it's an Image Encryption switch on the Device Settings page (EZVIZ). With encryption on, the app asks for a password before it shows video. Unless you've changed it, that's the 6-letter verification code (EZVIZ). Some indoor models, such as the H6c, also list a sleep mode for privacy in their specifications.
Share your cameras with family
Don't hand out your login. A camera can only be in one account (EZVIZ), so add family members as guests:
- Tap Account at the bottom right of the home page, then Family & Guests.
- Tap Add Sharing, enter the other person's registered EZVIZ email or phone number and tap Continue.
- Pick the cameras. Tap a camera to set what they can do, and select Authorize encryption password so they aren't asked for the code.
- Tap Add sharing, switch on the two agreements and tap Agree.
The cameras appear on their phone once they accept the invitation (EZVIZ). If nothing shows up, check they accepted it and that their account is in the same region as yours (EZVIZ). Not every device can be shared. If a camera isn't in the list, it can't be.
To change what someone can see, open Family & Guests, tap the camera, then the person, make the change and tap Save (EZVIZ). To stop sharing, tap Remove User on the same screen (EZVIZ).
One account can be signed in on up to 10 devices at once (EZVIZ), but guest accounts let you remove one person without changing your password.
EZVIZ on PC and Mac
The official EZVIZ download for Windows is EZVIZ PC Studio, listed on EZVIZ's Download Centre. Sign in with the same EZVIZ account you use on your phone (EZVIZ). For playback, select the camera, click Gallery at the bottom left of the live view page, then pick a date and time.
Advanced settings, and exporting recordings from the camera's card, need the PC on the same network as the camera. Export only works on some models (EZVIZ).
The Download Centre lists no Mac software, but the App Store lists the phone app as compatible with Macs that have an Apple M1 chip or later and run macOS 12.0 or later.
Search results for EZVIZ on PC include plenty of third-party download sites. Get the installer from EZVIZ's own Download Centre instead.
EZVIZ app problems and fixes
Start with the camera's light, then work through these.
Connection problems
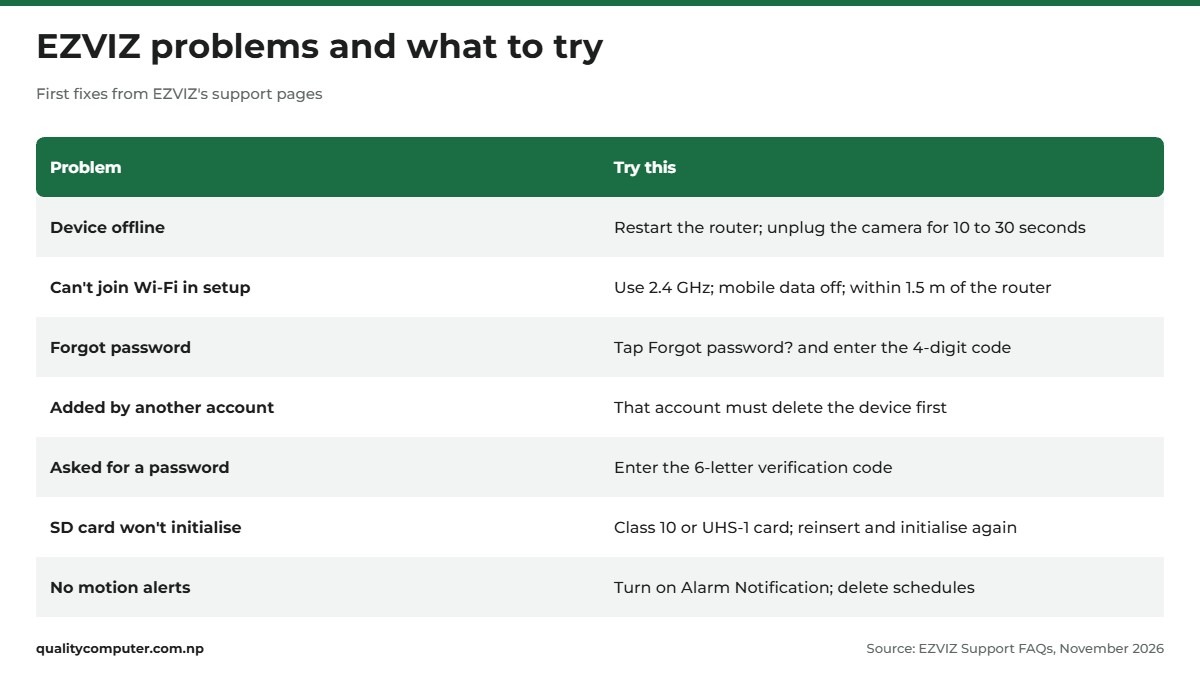
- Device offline: if the light is solid or slow-flashing blue, refresh the home page. If it's slow-flashing red, restart your router, then unplug the camera for 10 to 30 seconds and plug it back in. Still offline? Tap the three dots, Device Settings, Wi-Fi, and set up the Wi-Fi again. The app asks you to hold the reset button until the light flashes blue quickly (EZVIZ).
- You changed the Wi-Fi password: hold the camera's reset button for about 5 to 10 seconds so it goes back into Wi-Fi setup mode, then enter the new password under Device Settings, Wi-Fi (or Network Settings, Wi-Fi) (EZVIZ). Our router login guide shows how to find and change the password.
- Setup fails at the Wi-Fi step: most EZVIZ cameras only work on 2.4 GHz. Only a few models, such as the C6 and H6, also support 5 GHz (EZVIZ). Move the camera closer to the router, away from microwaves and thick walls. Upload speed should be above 2 Mbps per camera, with DHCP on and IPv6 off in the router (EZVIZ). If the app says it's unable to join network EZVIZ_SN, turn off mobile data and keep the camera within 1.5 metres of the router.
Account and recording problems
- Forgot your password: on the login page tap Forgot password?, then Send. Complete the picture check, enter the 4-digit code sent to your email or phone, set a new password and tap Save (EZVIZ). No code? Check your junk mail, and make sure your phone can receive SMS short codes (EZVIZ).
- Device already added to another account: the old account has to delete it first. Ask the installer or previous owner to open the camera's live view, tap the gear icon, scroll down and tap Delete Device (EZVIZ). If you can't reach them, contact EZVIZ support. We couldn't find a self-service unbind option in EZVIZ's help pages.
- Asked for a password before video plays: enter the 6-letter verification code. If you changed the encryption password and forgot it, use Decrypt to get a code by email or SMS. Resetting the camera brings back the original code, but recordings made under the old password still need it.
- SD card won't initialise: check it's Class 10 or UHS-1. Switch the camera off, take the card out and put it back, switch on and initialise again. Still failing? Try another card, and update the app and the camera's firmware.
- No motion alerts: make sure Alarm Notification is on, delete any notification schedules, then wave your hand in front of the lens to test it (EZVIZ).
Quick verdict
- Sign up and pick your region carefully: it can't be changed later.
- Use 2.4 GHz Wi-Fi for setup. Most EZVIZ cameras don't support 5 GHz.
- The verification code is 6 capital letters on the camera's label.
- Initialise a microSD card in the app before you rely on it.
- Share with family through Family & Guests, in the same region.
- On Windows, use EZVIZ PC Studio from EZVIZ's Download Centre.
EZVIZ cameras and memory cards in our store
Setting up a new camera, or need a card so it can keep recordings? These EZVIZ cameras and microSD cards are from our range.
| Product | What it is | Our price |
|---|---|---|
| EZVIZ H6c G1 2K home camera | Indoor pan-and-tilt camera, 2K | Rs 4,300 |
| EZVIZ H6c G1 3K home camera | Indoor pan-and-tilt camera, 3K | Rs 5,900 |
| EZVIZ H8c Pro 3K outdoor camera | Outdoor pan-and-tilt camera, 3K | Rs 8,400 |
| Lexar 633x 64GB microSDXC | 64GB microSD card | Rs 2,550 |
| Lexar 633x 128GB microSDXC | 128GB microSD card | Rs 4,900 |
Prices checked on 14 November 2026 on our website.
In our store
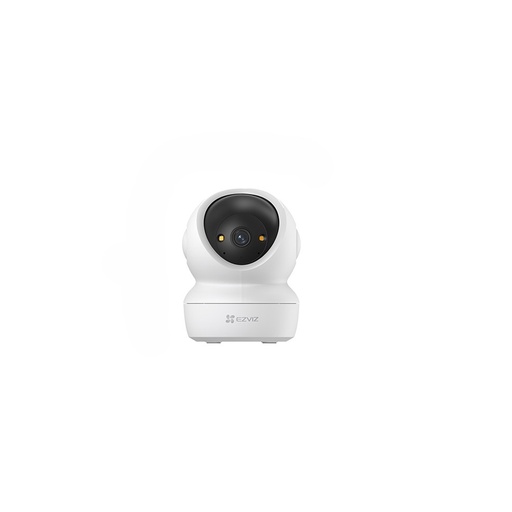
EZVIZ H6c 2K
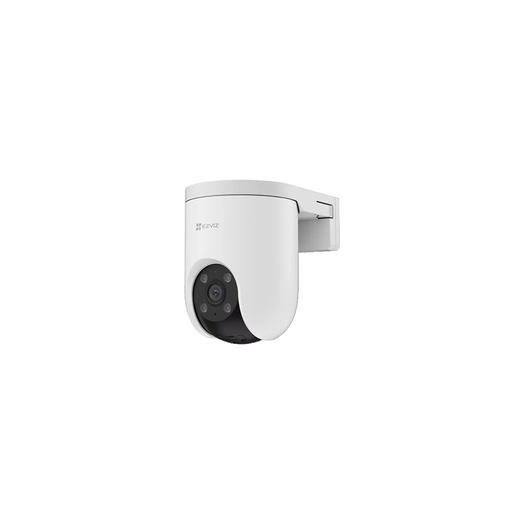
EZVIZ H8c Pro
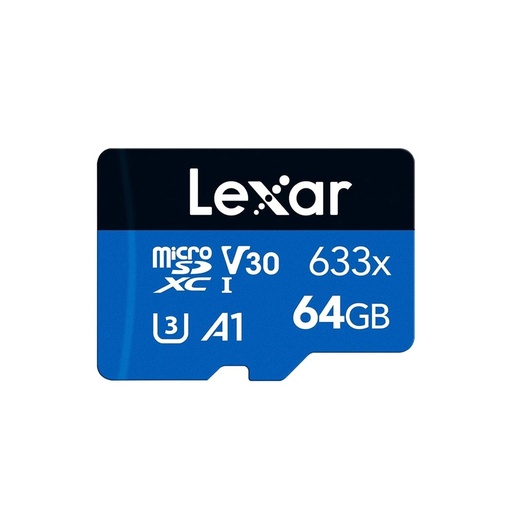
Lexar 64GB
Frequently asked questions
How do I connect my EZVIZ camera to my phone?
Install the EZVIZ app, sign up and choose your region. Connect your phone to 2.4 GHz Wi-Fi, tap + on the home page, scan the QR code on the camera's label and follow the prompts to connect the camera to your Wi-Fi.
Where is the EZVIZ verification code?
It's 6 capital letters printed on the camera's label, usually on the back or bottom. If the camera is already in your account, find it in the camera's Settings under Device Info or About. For a camera first added to an EZVIZ NVR or DVR, it's the recorder's admin password.
Can I use EZVIZ on PC?
Yes. On Windows, install EZVIZ PC Studio from EZVIZ's Download Centre and sign in with your EZVIZ account. On a Mac with an Apple M1 chip or later and macOS 12.0 or later, the App Store lists the EZVIZ app as compatible.
Is the EZVIZ app free?
Yes, the App Store lists the EZVIZ app as free. EZVIZ CloudPlay cloud storage is a separate paid plan, and EZVIZ says cloud storage is only available in certain regions.
Why does my EZVIZ camera say device offline?
The camera has lost its connection. Restart your router, unplug the camera for 10 to 30 seconds and plug it back in. If it stays offline, set up its Wi-Fi again from Device Settings, Wi-Fi, especially if you changed your Wi-Fi password.
Does EZVIZ work with 5 GHz Wi-Fi?
Most EZVIZ cameras use 2.4 GHz only. EZVIZ lists a few dual-band models, including the C6, C6P, H6 and Mini Plus. Connect your phone to 2.4 GHz Wi-Fi while you set the camera up.
How do I remove an EZVIZ camera from another account?
The account that has the camera must delete it: open the camera's live view, tap the gear icon, scroll down and tap Delete Device. A camera can only be in one account, so you can add it only after that. If the old owner can't be reached, contact EZVIZ support.
Sources
- How to add device?, EZVIZ Support, updated 10 June 2025
- How to add a new device in the EZVIZ App, EZVIZ Support, updated 29 November 2023
- Where to find the EZVIZ device verification code, EZVIZ Support, updated 17 November 2025
- What should I do if the app says "Unable to join network EZVIZ_SN" during the configuration process, EZVIZ Support, updated 15 January 2026
- How to create an EZVIZ account?, EZVIZ Support, updated 21 November 2023
- How can I change the account region, EZVIZ Support, updated 12 September 2023
- Regions regarding EZVIZ Services Notice, EZVIZ
- EZVIZ on the App Store, Apple, checked 13 November 2026
- How to share the device to my families or friends?, EZVIZ Support, updated 29 December 2025
- Why does the sharing fail sometimes?, EZVIZ Support, updated 13 January 2026
- How to initialize the memory card inserted into the camera?, EZVIZ Support, updated 4 January 2026
- What to do if the SD card cannot be initialized?, EZVIZ Support, updated 6 January 2026
- EZVIZ CloudPlay, EZVIZ
- H6c 4MP datasheet, EZVIZ
- Download Centre (EZVIZ PC Studio), EZVIZ Support
- How to deal with the system message "Device is offline"?, EZVIZ Support, updated 6 November 2023
- What should I do when the Wi-Fi connection fails during device pairing?, EZVIZ Support, updated 5 January 2026
- Does EZVIZ product support 5 GHz Wi-Fi?, EZVIZ Support, updated 6 November 2023
- What if I forget my password?, EZVIZ Support, updated 27 February 2025
- How to delete or remove a device from your EZVIZ account?, EZVIZ Support, updated 6 November 2023